This guide explains how to navigate and check out on the Large Format Kiosk.
To learn how to Activate and Configure Kiosk please click here.
Navigate the Menu
You may navigate the menu by scrolling up and down or tapping the menu category to navigate to that category.
Menu Categories
Menu categories display in alphabetical order by default.
You may choose to display categories by editing their numerical position, which will override the alphabetical order.
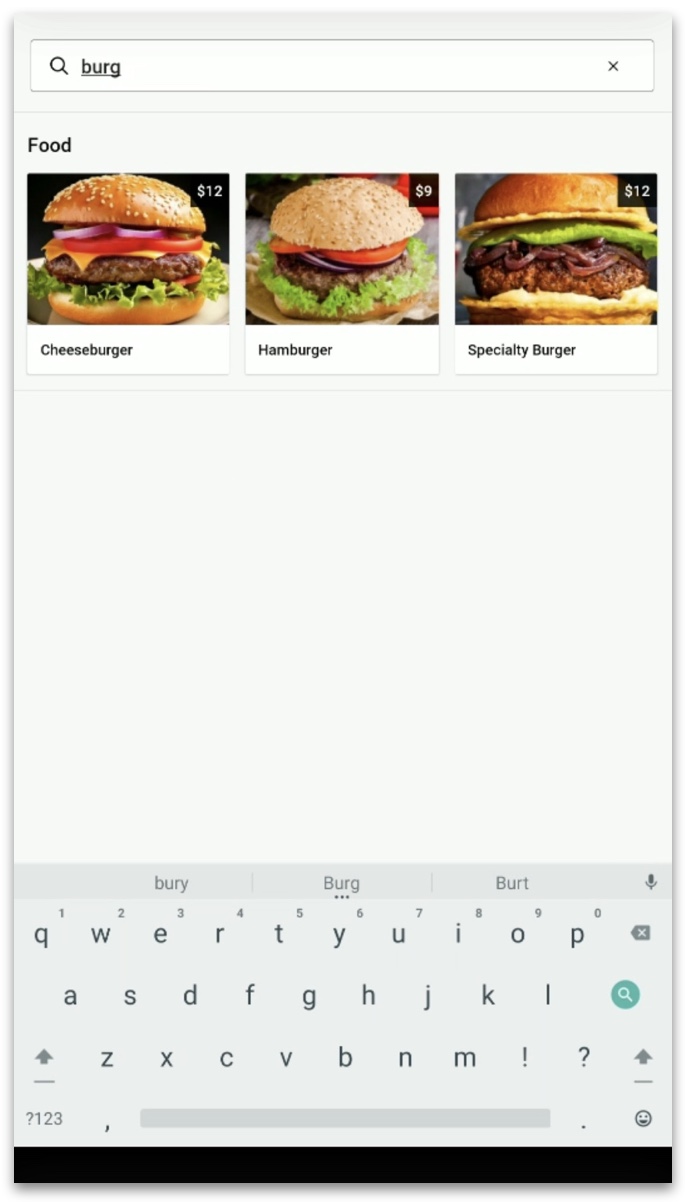
Search Menu Items
Tap the Search Menu bar and use the keyboard to find menu items.
You may scroll up and down the searched items to view more. When finished with the search tap the x.
To dismiss the keyboard, tap DONE.
Menu Items
Display Name
The Display Name you enter for a menu item appears directly on the DM Kiosk for guests to see.
Images and Icons
Images can be included with menu items to enhance their appearance.
You may also choose to add an icon in place of an image.
If no image or icon is added, a black and gray icon will display by default.
To read more about Images, click here.
Alcoholic Items
A menu item can be marked as an alcoholic item, which allows you to limit how many alcoholic beverages can be ordered per person (order). The default alcoholic beverage limit on Kiosk is 2 if the Max alcoholic items per order field is left blank.
You may also customize the Alcoholic Item Display Message. The message appears when a guest taps a menu item marked as an Alcoholic Item.
When adding an alcoholic item to the cart, you will be notified of the venue's alcohol policy.
When you've reached the maximum alcoholic items per order, you will be notified and unable to add additional alcoholic items.
Scan-only Items
Scan-only items - Checking the Scan-only checkbox adds that to the group of items that may be hidden from view on the Kiosk menu. Items that are scan-only must be added to the cart by scanning the barcode using an external scanner. Scan-only items are not displayed on the menu and cannot be searched for on the menu.
Modifiers
Modifiers light up green as they are selected.
Required
If a modifier is required, "Required" will be clearly displayed above the options. The Add to Order button will be grayed out until a modifier is selected.
Optional
If a modifier is optional, "Optional" will be clearly displayed above the options.
Single Selection
Single selection allows the guest to pick just one modifier. The selected modifier turns green.
Quantity Limit (Limit Selection to_)
If there is a quantity limit on the modifier, once the limit is reached the unselected options will be grayed out.
Place an Order
The checkout process varies based on whether the location is set for Expeditor Mode or Scan and Go.
Expeditor Mode/Digital Receipts and Notifications
When a location is enabled for Digital Receipts and Notifications, the guest is prompted to input their name and phone number so they can receive texts about the status of their order after tapping Pay Now.
Note: The Name Field is required.
Entering the phone number is optional.
If you enter your phone number, tap Next to continue to the payment options.
Tap No Thanks to the phone number. If you select No Thanks, answer the Are You Sure? prompt on the next screen. If you do not enter your phone number, you will not receive text notifications about the status of your order.
Scan and Go
On the Large Format Kiosk, you may enable Scan & Go Mode, which takes away the menu items on the screen and prompts guests to scan menu items to add them to their order.
If guests experience an issue with scanning a barcode on a particular item, the Search Menu option allows them to search the menu for that item.
If you prefer not to allow guests to search the menu, you may toggle Hide Search on, which will hide the Search Menu button.
| Functionality Chart | Hide Search On | Hide Search Off |
| Scan & Go On | Menu items are hidden and guest is prompted to scan items with scanner. Guests do not have the option to search the menu as the button is hidden. |
Menu items are hidden and guest is prompted to scan items with scanner. Guests may use the Search Menu button to search for any item that could not be scanned. |
| Scan & Go Off |
Menu items are displayed and can be tapped or scanned to add item to the cart. Guests do not have the option to search the menu as the button is hidden. |
Menu items are displayed and can be tapped or scanned to add item to the cart. Guests may use the Search Menu bar for any item that can not be scanned. |
Note:
Items that are scan-only must be added to the cart by scanning the barcode using an external scanner. Scan-only items are not displayed on the menu and cannot be searched for on the menu, even if Hide Search is Off. To learn how to mark an item as Scan-Only, click here.
Check Out
When you're ready to check out, click Pay Now.
How to Add Loyalty
After clicking Pay Now, if venue has a Loyalty program, the next screen will ask you to add loyalty.
1. Click Add Loyalty.
2. Scan the Loyalty barcode using the external barcode scanner or swipe the loyalty card. If needed, tap Enter Account Manually to type the Loyalty account number.
3. If you don't have Loyalty, tap Skip.
How to Pay with Stored Value
1. On the checkout screen, select the stored value payment tender you are using.
2. Scan the QR code using the external barcode scanner or swipe the stored value gard. If needed, tap Enter Account Manually to type the stored value account number.
Order Adjustments on Kiosk
Order adjustments such as tax, surcharges, gratuities, and discounts will be displayed on the checkout screen before paying.
Donations and Tips are added after selecting the payment method.
Tax
Tax will be displayed on the checkout screen below the subtotal.
Inclusive Tax will say (included).
Surcharge
Surcharges are supported in DM Kiosk.
A surcharge are automatically added to every order at the Location where it is enabled.
Gratuity
Automatic gratuity by percentage or dollar amount is supported in DM Kiosk.
Manual gratuity and manual custom gratuity are not supported in DM Kiosk.
Discount
Clover Sport Manager pre-configured and custom discounts are not supported in DM Kiosk.
Some third-party Loyalty providers provide promotional discounts that can be applied to an order
Donation
Donations are supported in DM Kiosk.
A donation prompt populates on the customer facing display after selecting credit as the payment tender before the tip prompt (if tips are enabled).
To read more about Donations, click here.
Tips
When using Kiosk, tips for a Location are always digital, never added to a printed receipt.
Receipts
Printed Receipts
There are three options for printed receipts on DM Kiosk:
| Functionality Chart | Auto-print kiosk receipts setting | Hide print receipt button setting | Result |
|
Option 1: Auto-print all receipts |
On | Disabled - cannot adjust this setting if using auto-print | A receipt will automatically print for every order. |
|
Option 2: Provide guest option to print receipts |
Off | Off |
No receipts automatically print. The option to print the receipt is visible to the guest. |
|
Option 3: No printed receipts at all |
Off | On |
No receipts automatically print. There is no option for the guest to manually print the receipt. |
Below is an example of a print receipt button and a text receipt button.
In this Location, Option 2 for printed receipts is set up:
Auto-print Kiosk receipts is toggled off and Hide print receipt button is toggled off. Text receipts are on.
Text Receipts
Text receipts are available on DM Kiosk. If Enable text receipts for Kiosk is toggled on, a text receipt option appears after the order is closed.
1. Tap Text Receipt
2. Tap the phone number field.
3. Type your phone number. It must be a 10-digit phone number.
4. Tap Send.
Note: After an order is closed, after 6 seconds of inactivity on the touch screen, the guest loses the opportunity to get a texted receipt.